Dahlia Storage & Splitting Tips
- Homestead Growers

- Jan 23
- 3 min read
Dahlia Storage & Splitting Tips: Keep Your Blooms Happy Through Winter
There’s nothing quite like digging your hands into rich soil to lift up a beautiful dahlia clump at the end of the season. But once those blooms have faded and frost is on the horizon, what comes next can make all the difference in how your dahlias perform next spring. At Homestead Growers, we’ve learned that taking just a bit of TLC in storing and splitting your tubers pays off in big, vibrant bouquets later on. Here’s how we do it — and how you can too! 🌼

🌿 1. When to Lift Your Dahlias
As autumn cools and frost starts to nip at the leaves, it’s time to harvest your tubers. In cooler climates like ours in Michigan, dahlias won’t survive freezing soils — so once the top growth has blackened fro
m frost, snip the stalks back to a few inches and gently dig up your tuber clumps. Take care not to break those tender necks — they’re where next season’s magic begins!
💦 2. Clean & Cure Before Storage
After lifting the clumps, carefully brush or hose off excess soil. Removing the dirt helps reduce rot during storage, but avoid prolonged soaking — dahlias prefer to dry just enough to firm up their skins before winter. Let them air dry for a day or two in a cool, well-ventilated spot.
Quick pro tip: You’ll want to strike that balance — not bone dry, but not sopping wet either. A little drying helps protect against mushy tubers.
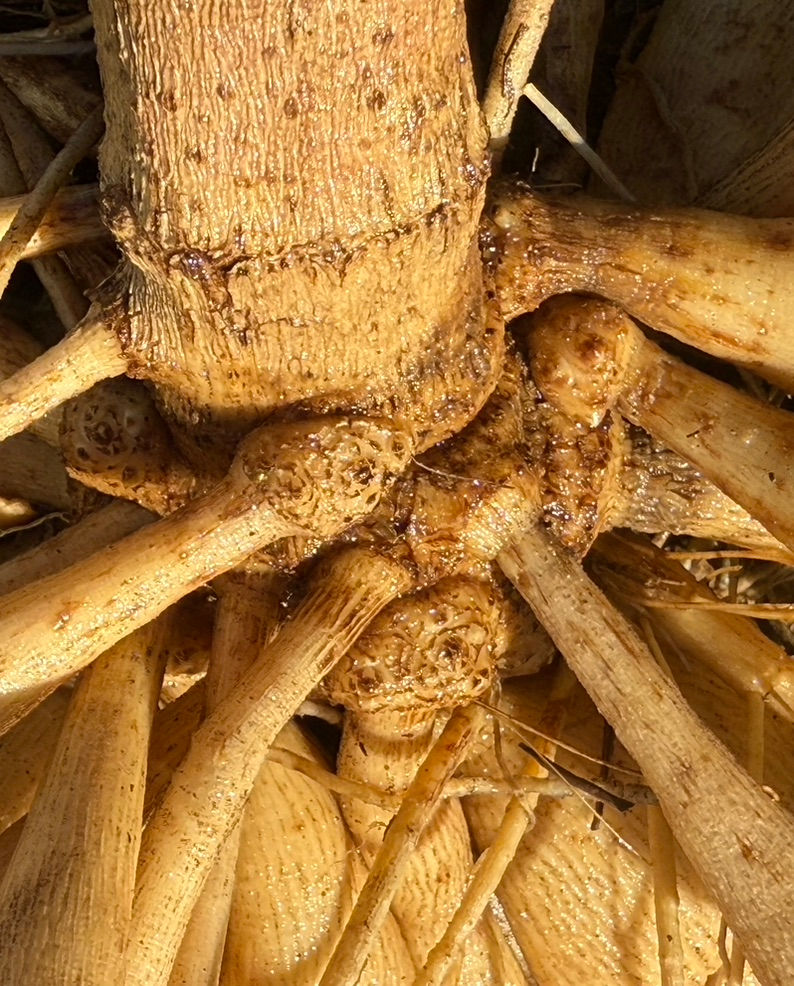
✂️ 3. Divide the Clumps (Fall or Spring)
There’s some flexibility here. You can divide your dahlias right after digging — when the clumps are easier to cut apart — or wait until late winter/early spring when the new buds (eyes) start to show and are easier to spot. Either way, each divided piece needs:
At least one visible eye (growth point),
A piece of the crown where the stem meets the tuber,
And a bit of neck attached for healthy sprouting.
Use a sharp, clean knife or pruning snips, and sterilize between cuts to avoid spreading disease. Some gardeners even use a light dusting of sulfur or cinnamon on cut surfaces to help fend off rot.
📦 4. Pack ’Em Right for Winter
Packing your tubers correctly makes all the difference in spring success. We love gently nesting them in Vermiculite. This material helps regulate humidity and prevent excess moisture that leads to rot. Label each variety clearly so you know exactly what’s in each box or bag — nothing worse than forgetting which beauty you’re looking forward to next year!
🌡️ 5. Find the Perfect Winter Spot
Your tubers want a cool, frost-free space that stays consistent — think about 40–50°F if possible. Spots like unheated garages (as long as they don’t actually freeze), cool basements, or root cellars are all great choices. Too warm? Tubers might start sprouting. Too cold? They could freeze and rot. Monthly check-ins help catch issues early.
🌱 6. Spring Wake-Up Call
When the world starts warming and the threat of frost has passed, bring your tubers out and let them wake up in a slightly warmer, bright spot. If you want earlier blooms, pot them up indoors before planting outside. Otherwise, wait until after the last frost to plant directly in the garden and watch your dahlia dreams grow!
Taking care of your Dahlia tubers through winter may sound like a bit of work, but we promise — your spring garden will thank you. With some love, clean storage, and a few mindful splits, you’re setting yourself up for another season of stunning blooms that make bouquets (and hearts 💛) come alive.
Have your own favorite dahlia tips or stories? Drop them in the comments — we love hearing how your gardens grow! 🌸✨


Comments